3. Vagrant tạo, chạy máy ảo trên Hyper-V – Tự động 100%
1. Chạy LAB = 2 bước
1. Chạy PowerShell = Administrator → cài Hyper V bằng lệnh dưới
# Tự động Restart máy
ECHO Y | powershell Enable-WindowsOptionalFeature -Online -FeatureName Microsoft-Hyper-V -All

# Chọn có Restart máy hay không --> phải Restart mới ăn
Enable-WindowsOptionalFeature -Online -FeatureName Microsoft-Hyper-V -All
2. Tạo + chạy máy ảo tự động
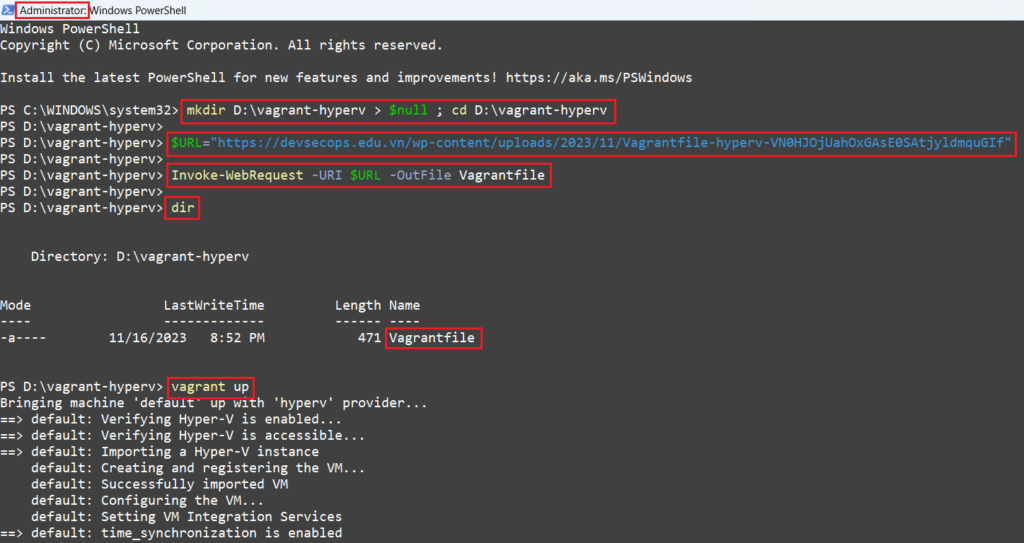
# Tạo + chuyển vào thư mục D:vagrant-hyperv
mkdir D:vagrant-hyperv > $null ; cd D:vagrant-hyperv

# Download Vagrantfile về thư mục đang đứng
$URL="https://devsecops.edu.vn/wp-content/uploads/2023/11/Vagrantfile-hyperv-VN0HJOjUahOxGAsE0SAtjyldmquGIf"
Invoke-WebRequest -URI $URL -OutFile Vagrantfile

# Coi trong thư mục đang đứng có gì
dir

# Tạo + chạy máy ảo
vagrant up

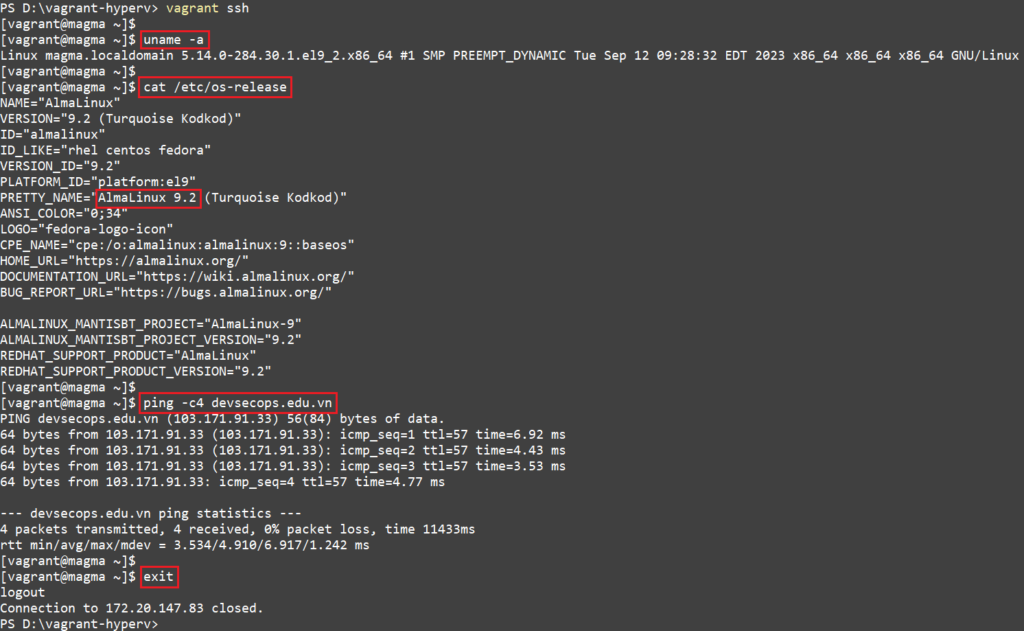
# Vào máy ảo
vagrant ssh

# Coi kernel version
uname -a

# Coi OS version của máy ảo
cat /etc/os-release

# Coi máy ảo ra Internet được hem?
ping -c4 devsecops.edu.vn

# Thoát khỏi máy ảo
exit

![]() Coi trên Hyper-V Manager đã thấy có máy ảo
Coi trên Hyper-V Manager đã thấy có máy ảo

2. Vagrantfile mới nhất ở đây
Vagrant.configure("2") do |config|

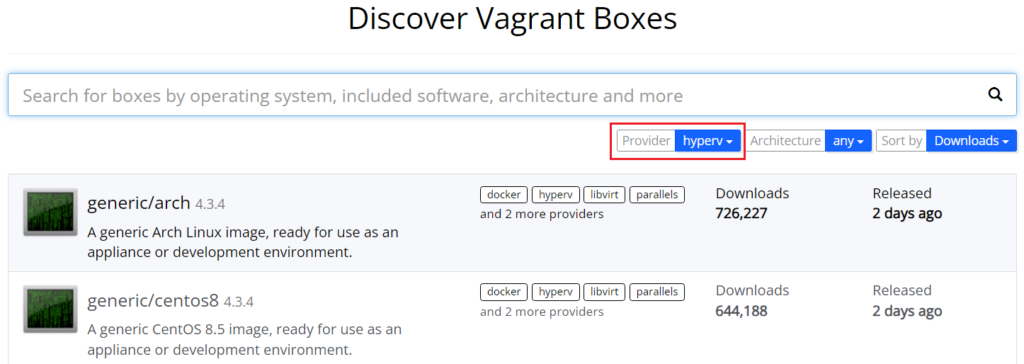
  config.vm.box = "generic/alma9"
  config.vm.provider "hyperv"
  config.vm.network "public_network"
  config.vm.synced_folder ".", "/vagrant", disabled: true

  config.vm.provider "hyperv" do |h|
    h.enable_virtualization_extensions = true
    #h.linked_clone = true
    h.vmname="AlmaLinux9-VM"
    h.memory="2048"
    h.cpus="2"
    h.vm_integration_services = {
      time_synchronization: true
    }
  end

end
3. Các tham số cấu hình máy ảo trên Hyper-V của Vagrant
4. Chọn máy ảo Hyper-V của Vagrant thì

